

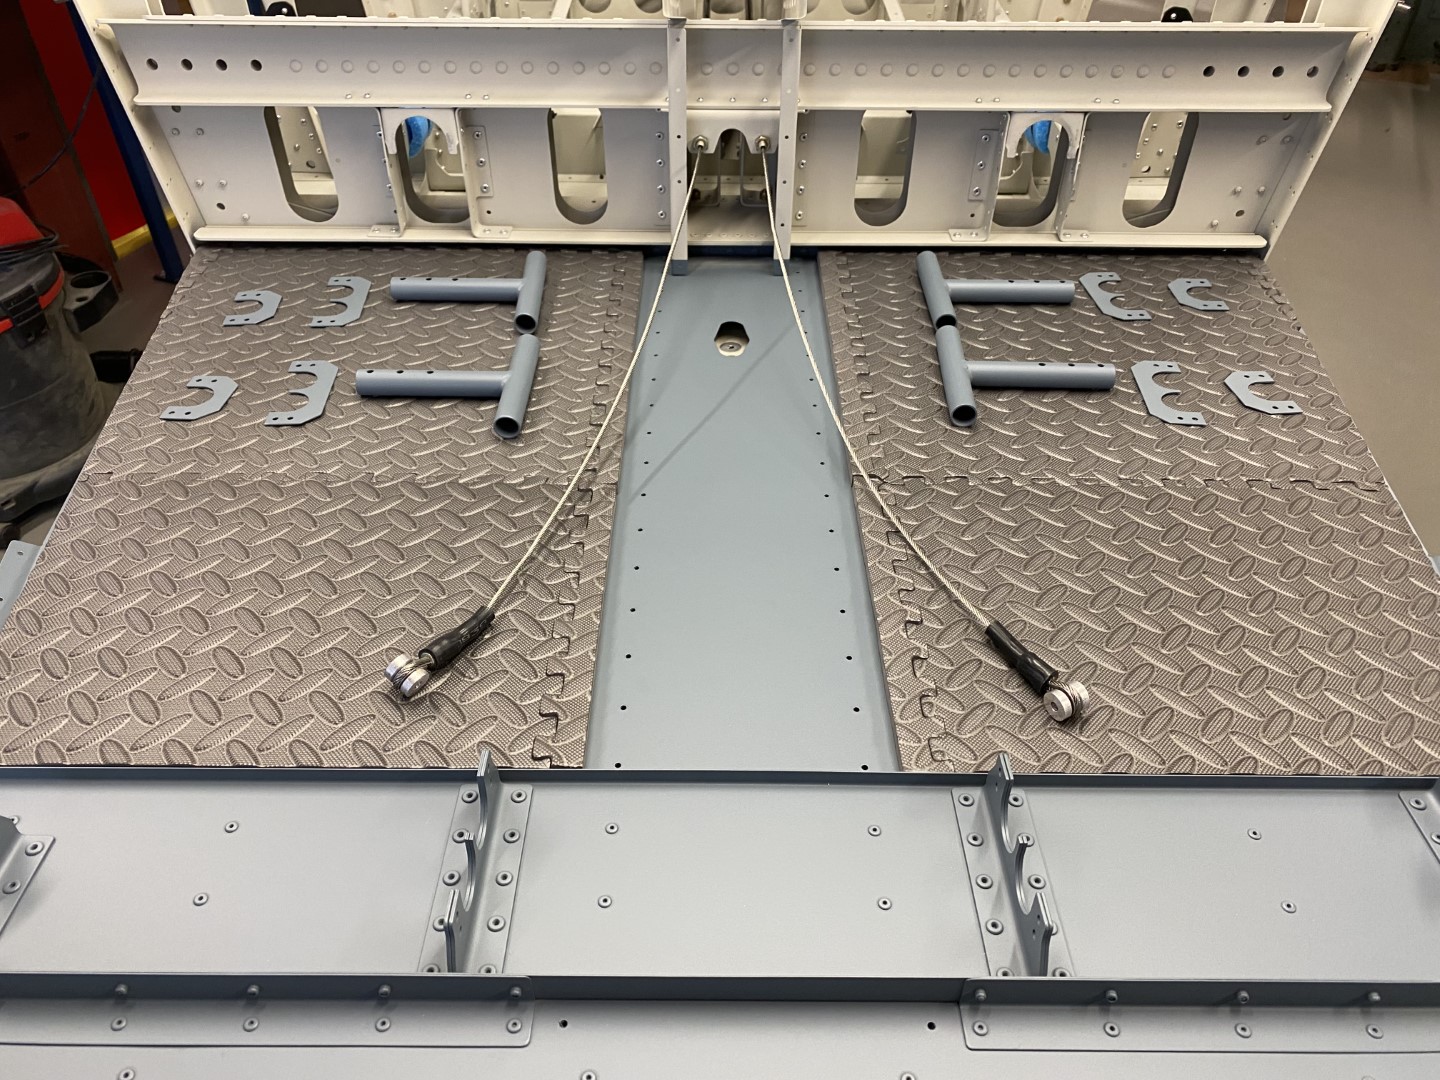
Installing rudder cables sleeves and flap motor.
The inner rudder cable didn’t fit so I opened up the slot with a file:

Outside cable screwed in place:

And front as well. To protect the painted floor I cut some cheap floor tiles to size:
Testing the flap motor. When connecting the red and black wire to 12V the motor moves until the builtin limit switch kicks in, changing the polarity moves the actuator to the other position:

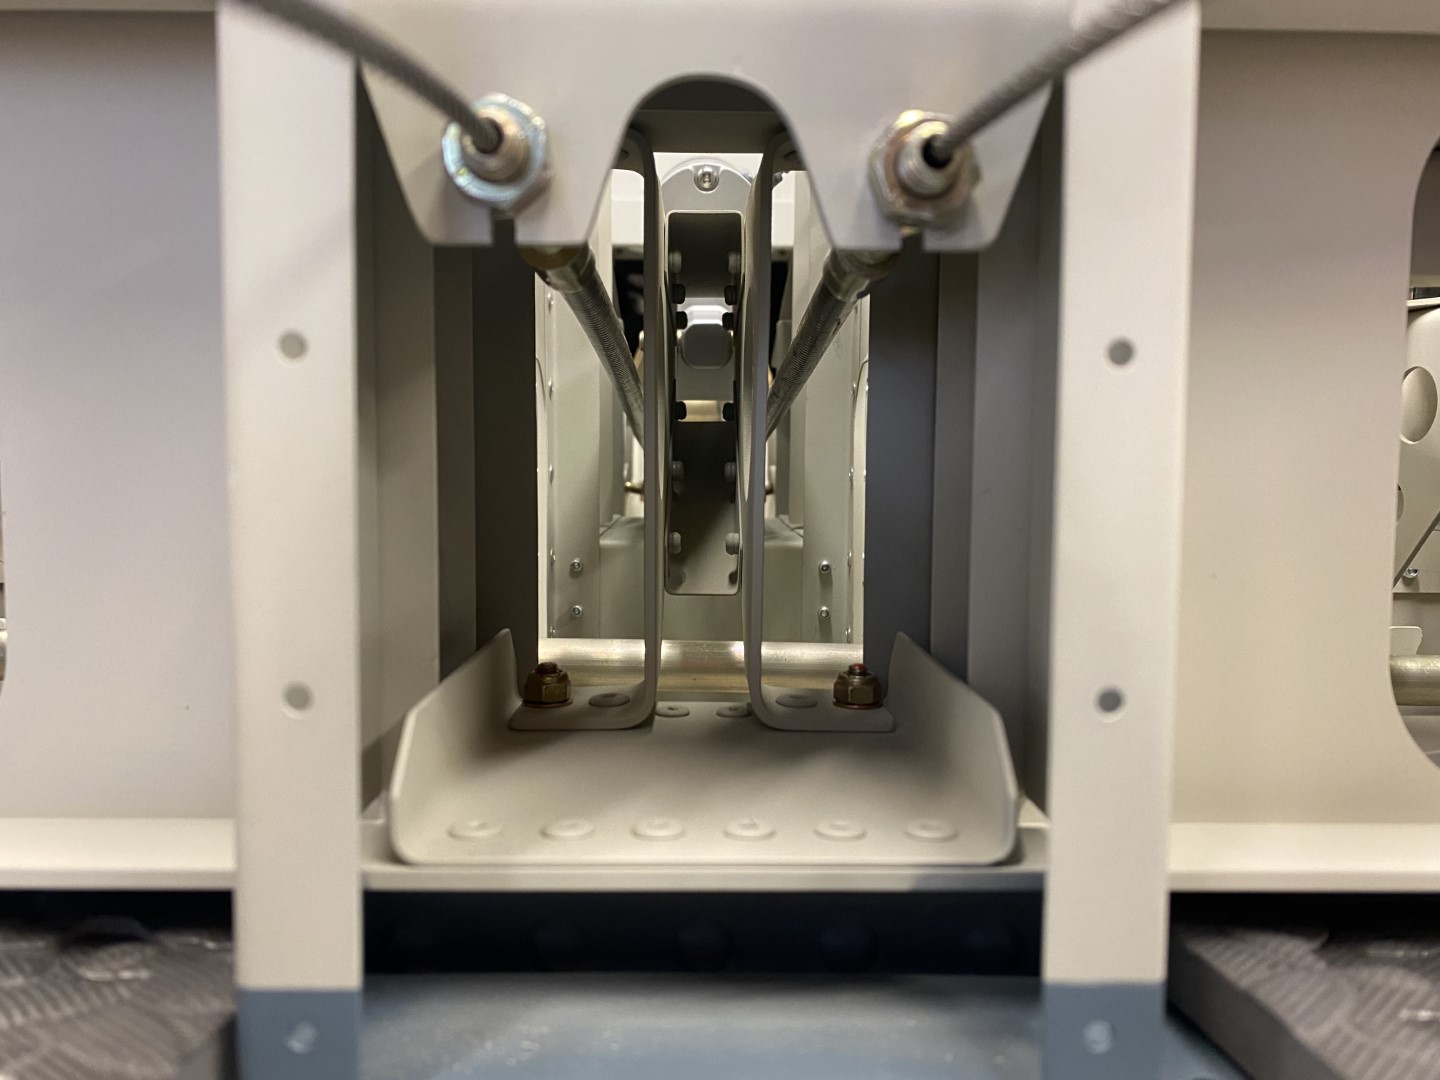
Nothing is written in the manual how tight the outside cable should be installed, when it’s straight the bracket of the flap torque tube rubs against the outside cable:

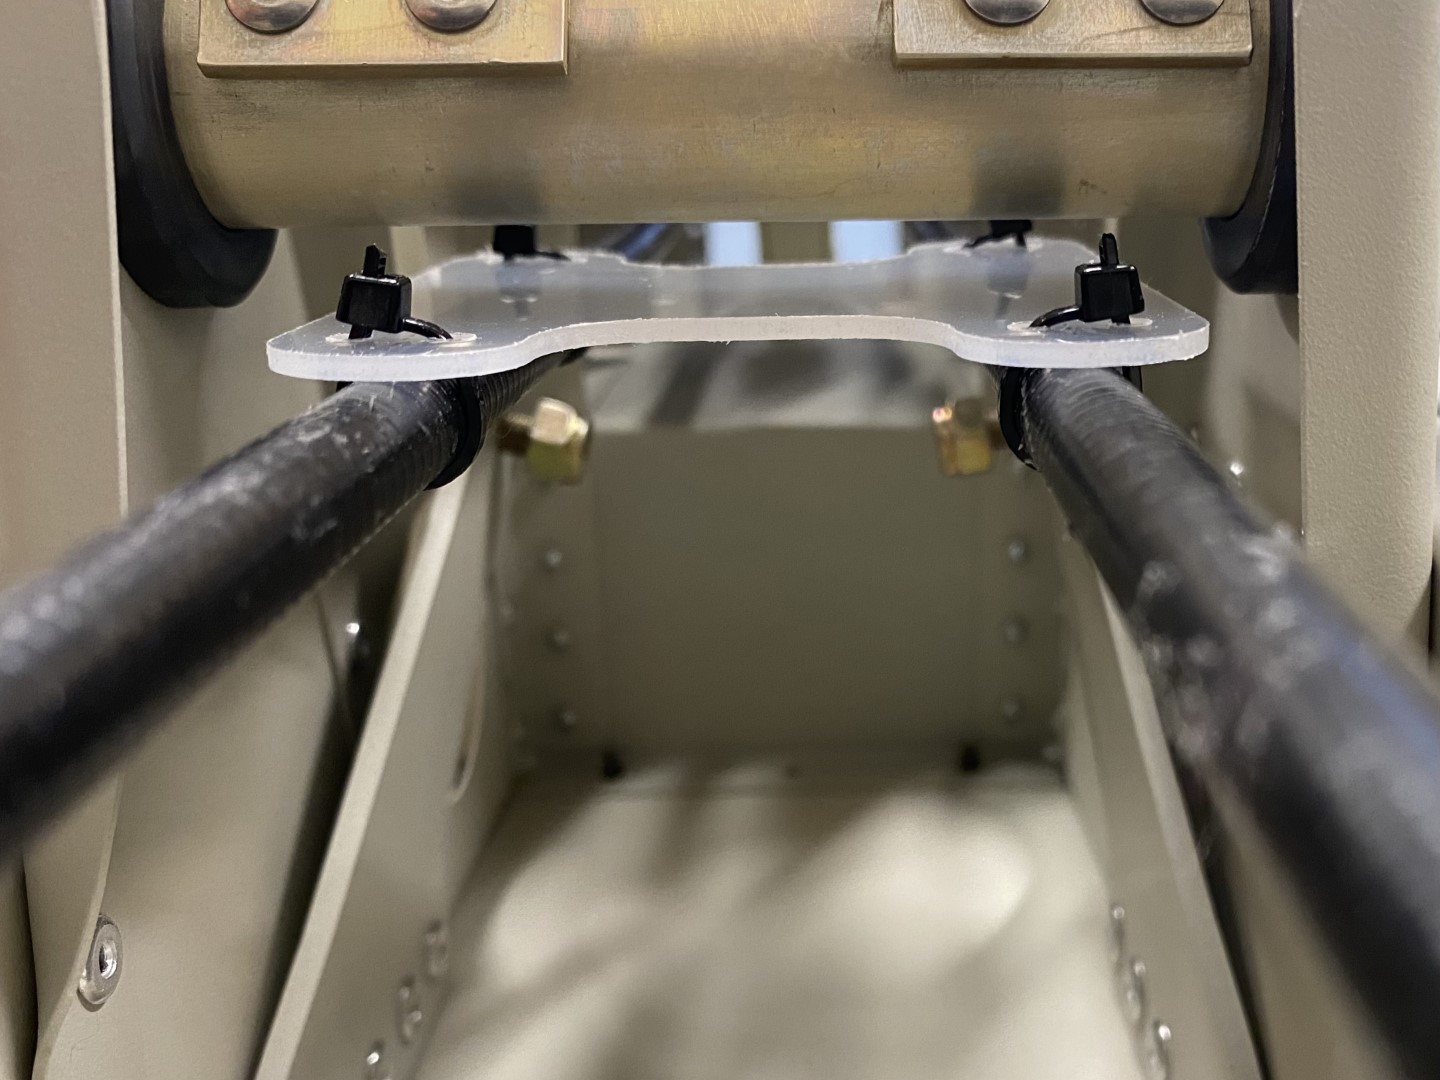
To protect the outside cable I made a custom protector plate from polypropylene (same material as the rudder guides are made of):

Next I loosened the outside rudder cables a bit, they are not tight anymore and bend downwards a tiny bit:
Now there is much more room and the custom made protector plate would not be needed. However I leave it in place for now and see how it works when the inside cables are tight, it’s easy to remove later:
The flap motor is mounted with 3 thick washers and a castle nut. I didn’t install the cotter pin yet because I’m pretty sure it has to come out soon for routing all kinds of wires:

Short video of the flap motor test in the plane: